Tag Archives: idea

Arm Knitting- So Much Fun!

Well I gotta tell you, arm knitting isn’t the cheapest way to make a scarf (the wool can be pricey), but it might be the most fun!

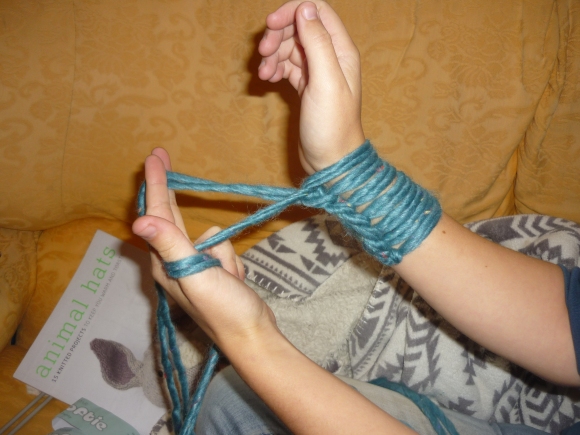
P1090079

Arm knitting is all the rage- it’s very, very quick, it’s easy (even for beginners) and it produces the most gorgeous thick scarves and blankets! In knitting, the larger the needle (compared to the wool thickness), the looser the weave. So even the thickest wool can be knitted very tightly if you use too-small needles, and even light fingering wool can be loose-weaved when large needles are used.

With arm knitting, the knitter uses their arms instead of needles, which creates large, thick stitches. Thick wool is needed to ensure the garment doesn’t become too ‘holey’ like lace, but instead looks like a really chunky weave.


I won’t go into too much detail about how to arm knit. Firstly, it’s hard to describe how to do it, even with pictures. Secondly, many people have made many excellent videos about how to arm knit, so I’ll point you towards these instead:

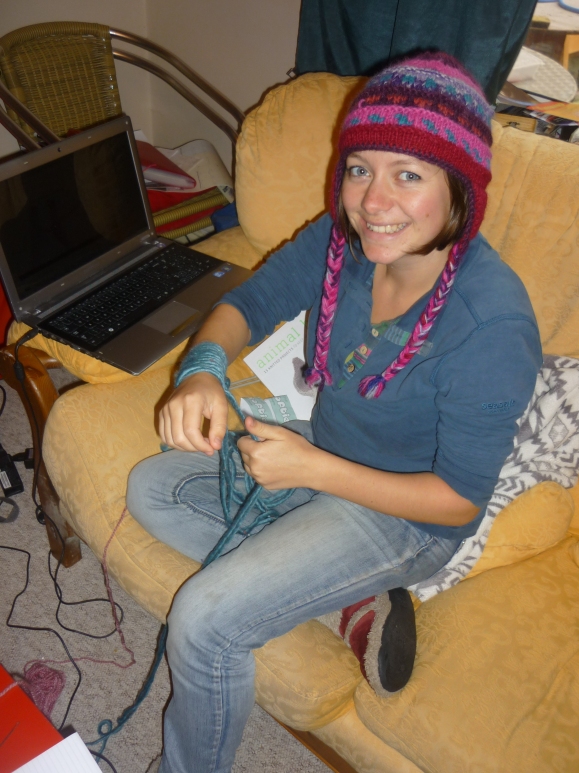
P1090077

P1090078

The main hurdle I found with learning to arm knit was finding the best wool for the project. There are no handy lists of perfect ‘arm knitting’ wools and yarns, so I’ll post a few recommendations for wool types to get you started. You will need 2 x 50g balls of most of these, and knit holding both together (most yarns out there are just not thick enough!).


  • Sirdar Big Softie- very soft, lovely colours. Used in the pictures. Available here
  • Sirdar Faroe Chunky – beautiful mixed colours, very natural. Available here
  • Sirdar Indie- Available here
  • King Cole ‘Ultimate Super Chunky’ – pre-knitted tubes to allow for really thick knitting. Available here

arm-knitting-how-to-wool

I hope you have a great time learning to arm knit, and I’d love to hear how you get on in the comments below.

And to all my friends and family- be prepared for a lot of these this year! 😛

Tagged , , , , , , , , , , , , , , , ,

Chilli Apple Jelly

Last year we were given a Christmas Hamper with the most delicious chilli apple jelly in! It was beautifully apple-y with a definite kick of chilli, and went delightfully well with brie!

We ran out a couple of weeks ago, but decided to make some ourselves for our own Christmas hampers- and make sure we got to keep some too! I phoned the friend that gave us them in the first place, and got a recipe, although it was somewhat vague… but it gave me something to work with!

So here’s my Chilli Apple Jelly recipe, adjusted from a recipe courtesy of Bella and Ben!

If you want to skip some steps, juice some apples and simmer them with chillies for a while, before going straight to step 7.

  1. Pick some crab apples. I got a whole plastic bag full.
  2. Put them in a saucepan and cover with water
  3. Add some chillis. It’s hard to say how many. I used 4 medium red ones from Aldi, plus one cayenne and a couple of hot ‘Apache’ that we grew this year…. if you’re not sure, aim for under rather than over as you can increase it later!
  4. Boil the apples and chilli for 45 minutes to an hour, until the apples are very soft.
  5. Strain through cheesecloth or muslin overnight by hanging from a cupboard door and allowing it to drip into a bowl. DON’T be tempted to squeeze as it will make your juice and jelly all cloudy!
  6. The next morning, stir your juice, and then taste. How’s the chilli kick? If it’s under, add some chillis in a muslin bag to step 8, or stir crushed chillies into the jars in step 10.
  7. Measure out the juice, and add sugar 500g to 500ml of juice. I used half granulated and half pectin-sugar to ensure I got a good set.
  8. Simmer in a pan until sugar is dissolved
  9. Turn up the heat until it reaches a rolling boil and start checking for ‘set’ by putting a drip onto a cold plate, looking for the characteristic ‘wrinkle’ under your finger. Repeat.
  10. Once it has reached the set point, pour into sterilised jars and seal! Don’t forget to add a pretty label!


Tagged , , , , , , , , , , , , , ,

Crab Apple Jelly

Ah, I do love autumn, have I mentioned that yet? I found a crab apple tree just bursting with beautiful pink fruits, and decided I just had to get going on little Christmas gifts. I collected a huge bag of fruits, and set off making crab apple jelly!

Here’s my recipe for crab apple jelly:

1. Prepare your crab apples. I just removed stalks and any blemished ones and put the whole lot into a saucepan.

2. Pour over boiling water to just cover.

3. Simmer for an hour until apples are soft.

4. Pour into muslin and tie corners together to make a bag. Hang from cupboard door handle, allowing it to drip into a bowl overnight.

5. The next day, discard anything left in the muslin WITHOUT SQUEEZING (this will make it cloudy!

6. Measure juice, and weigh out 450g of sugar for every 600ml juice (around 0.7:1 ratio of sugar to juice)

7. Place sugar and juice, and some lemon if desired into a saucepan and boil. Stir to melt the sugar, and allow to reach a rolling boil.

8. Boil for 20 minutes before you start to test for ‘set’- this is best done by placing a plate into the freezer. Every 5mins or so, place a drip of the misture onto the plate, leave for a minute, then run your finger through it. If the surface wrinkles as though it has a skin on, the jelly is ready!

9. Allow to cool for a couple of minutes before pouring into sterilised jam jars. Seal and leave to cool.

Ta-dah! Amazing and delicious jelly, perfect for giving as gifts! It’s the most gorgeous colour of pink/red, and I’m really proud of it! All that is left to do to ready it for gifting is a beautiful label- I’ll make those tonight!

Tagged , , , , , , , , , , , ,

An accident and a lesson learnt…

We’re very busy moving house right now, sensibly (or stupidly) spreading it over 2 weeks. Tomorrow, the first load goes up, which is everything we don’t need desperately over the next two weeks…. even the table is going!

A picture for you…. upstairs, the study is totally taken apart. Beds are standing against the wall next to bookcases, both with nuts and bolts taped to the side so we don’t lose them. Downstairs, boxes take up most of the living area, all ready to pile into a van tomorrow. And several cans of cleaning stuff, polish and mould remover stand ready around the house, waiting to jump into action.

In amongst all of this, we went blackberry and elderberry picking. It’s that time of year and I’m not one to let a good harvest go past without taking full advantage of it! The blackberries went straight into the freezer, but unfortunately the elderberries didn’t fit!

Not to let them go to waste, the best thing to do seemed to be to blend them and get them ready for fermentation, but not add the yeast until we were in the new house- it was only a couple of days!

Despite adding a campden tablet, Ian did report that it seemed to be hissing slightly, so we decided to add another. After a good long hunt, I found the campden tablets at the bottom of a box and went to open the bottle. Almost instantly, it started fizzing purple juice all over the table. Catching it in my hands I yelled to Ian to help, and he came running with a tea towel and caught it before it ended up all over the rental carpet.

Using a plastic bag, the tea towel, and a whole roll of paper towel to catch the fizz, we rushed it outside.

Coming back in to inspect the damage, and fearing the worst, I was impressed to note that only a few drops had ended up on the carpet. I went to report this to Ian, along with an idea for the clean-up. Just at that moment, Ian tried to release the pressure and the lid of the flagon flew 5-6m into the air- accompanied by a POP and a shower of a litre and a half of elderberry juice!

Ian was COVERED, I, less so, but was thankfully in the doorway, protecting the house from the worst of it. My washing was less lucky, and has gone in for a second rinse!Elderberry Explosion!

The kid next door saw the whole thing, but his main concern was whether it was blood, or tomato ketchup!

Luckily, it seems to have come out of the rental carpet, which up until now had not suffered too badly from our year of residence…

A lesson learned!


Tagged , , , , , ,

Cute Knitted Baby Hat

    Here’s another brilliant way to give a wonderful present whilst also saving money! This adorable baby hat uses very little wool, and I added stripes to mine so it even uses up some leftovers!

jester hat baby funky cute pattern

The pattern came from this Ravelry link: http://www.ravelry.com/patterns/library/jester-hat-6 and was surprisingly easy to follow, for such a complicated-looking end result!

My Hat:

I used DK wool in as many different colours as I could fit onto the hat, and using a white to separate each colour. Although most of the hat was knitted in stocking stitch, I did make the white stripes garter, 3 rows long, so they ‘stuck out’ a bit. I had a bit of a problem ensuring all my stripes were the ‘right side’- in the end the ear flap stripes had to be inside out, but c’est la vie!P1080414

I also decided that since a lot of my wool was not baby wool, a soft lining might be nice. For this I bought a black fleece from the charity shop, and cut two squares from it. My broken sewing machine was no use in stitching, so I sewed the two squares together by hand. I then turned the hat inside out and sewed the fleece to it along the top and down each side. When I turned it right-way-around again, I squeezed in a few more stitches at the front and back of the hat to make sure the lining lay flush to the hat.P1080418

I made two large pom poms for the end of each point of the hat, and also two smaller ones for the bottom of the ear-flap plaits. For instructions see my how to.

P1080413

I didn’t follow the pattern when it came to the plaits, as I can’t crochet and didn’t understand the instructions. Instead, I just plaited several coloured lengths of wool together and tied a string around the base to knot them together. I had some problems attaching the plaits, in the end just stitching them to the bottom of the ear flap, and using a coconut button to hide the join.

P1080408Attaching the pom pom to the bottom was no easier- I ended up attaching the pom pom string to the knot at the base of the plait, then taking all the strings from the base of the plait through the pom pom with a needle, and cutting them short so they were hidden by the pom pom. Needless to say, I’m not convinced it’s all that secure, but we’ll see!

P1080412

Either way, at the end of the day I have a very warm and totally unique present to give to a lovely little girl for her 2nd birthday… only 6 weeks late too! 😀

P1080405

Go on, make this for the adorable one in your life- you won’t regret it!

Tagged , , , , , , , , , , , , , , ,

Cheesy Chicken Sautee

Ah. Heaven!

This meal is simple, but delicious enough to make my mouth water just thinking about it! It has become a firm favourite in this household, and Ian keeps telling me I need to think of a new name for it, because this one doesn’t let on how AMAZING it is!

It is ridiculously cheap at around 80p a portion, and is divine enough to drag out for friends!

– Chicken. I use leg quarters from Aldi for 1.15 a pair- they’re cheap, and it doesn’t matter about the bones! One is enough per person!
– Canned tomatoes (x1 between 2 people)
– Onion (1 between 2)
– Fennel seeds, thyme and garlic to marinade (yes, the fennel seeds ARE essential- they are what makes this meal go from standard to special!)
– Cheese

  • Marinade the chicken legs in the fennel seeds, thyme, garlic, and salt and pepper for a few hours. I put them in there in the morning, so it is ready to start when I get home.
  • Brown off the chicken in a frying pan, then remove.
  • Fry the onions until soft, then add the tomatoes for a couple of minutes.
  • Pour the tomatoes over the chicken in a casserole dish. Leave in oven (170degrees) for 30minutes with lid on.
  • Remove lid and allow sauce to reduce.
  • Grate some cheese over the top, and return to oven until cheese is browned (5-10minutes)


I serve mine with a great big jacket potato. Definitely serve it with something that can mop up all that cheese-y, tomato-y juice!


And ta-dah. Another frugal meal to make you all smile!

Rock on!

Tagged , , , , , , , , , , , , , , ,

Free vegetable stock

So this is one of the most frugal recipes I’m ever going to give you. In fact, it’s free. It was suggested by a friend of mine, who heard it from someone else, but I have to admit I’ve been a little scared to try it! Anyway I finally went ahead and did it, and the results were fantastic! A totally delicious vegetable stock, homemade, and made for free. Plus, it used up things that might otherwise just fill up your bin!

Here’s how…

  • Collect lots of vegetable peelings. I make this stock on a Sunday, when I have made a roast and I have a whole bag of peelings to go on the compost. Literally any vegetable you have used can be put in this stock! Try– leaves from the outside of the brussels sprouts, potato peelings, parsnip and carrot peelings and tops, the snipped-off ends of green beans, onion skins, the top and roots of leeks, sweet potato cast-offs, and even the garlic skins.

P1080376

  • Place all of these in a saucepan or slow cooker and cover with boiling water.
  • Cover and boil for a couple of hours (as long as you like, really, as long as it isn’t losing too much water).
  • Strain through a sieve into a jam jar and freeze. Alternatively, place in saucepan on stove top and boil until concentrated, then pour into uce cube trays and freeze.
  • Compost the leftovers!

Whenever you want to use the stock (perhaps a risotto, stew or soup?) just defrost the jar or add an ice cube or two to your meal!

Go on, give it a go, and be frugal!

Tagged , , , , , , ,

Snuggly Warmy Hat!

Knitted hat

This is a hat I’m knitting for a Christmas present! I found the pattern in a little booklet that came free with a newspaper last year, and I’ve been envying it ever since… anyway as it’s coming up to Christmas I finally got around to knitting a couple as presents!

This is what the finished thing looks like:

Knitted hat bobble pompom

It is knit in chunky 100% wool in one of my favourite brands. The multicoloured one is now discontinued, which is sad, but Sirdar’s “big softie” range is similar and has a whole load of colours!

The pattern calls for it to be knit in the round on 10mm needles. I would definitely recommend using very chunky wool with this otherwise it gets a bit holey! However, as long as you scale down the needle and wool size along with scaling up the stitch numbers (keeping the stitches as a multiple of 6!), you should still be alright!

Here’s another one I’ve started:

The pattern goes like this:

  1. CO 48 sts with contrast colour. Join to knit in the round. Mark beginning of round with stitch marker or contrasting colour yarn
  2. (K2, p2) repeat, until it measures 10cm/4in.
  3. Change colour and continue K2P2 rib until it measures 25cm/10in from start.
  4. (K2, p1, s2togkpo, p2) repeat to end of round. 36sts
  5. (K2, p1, k1, p2) repeat to end of round.
  6. (K2, s2togkpo, p1) repeat to end of round. 24sts
  7. (k2,p2) repeat to end of round.
  8. (K1, s2topkpo) repeat to end of round. 12sts
  9. K to end of round
  10. (K2tog) repeat to end of round. 6sts
  11. Break yarn with long tail, pass through all 6 sts and pull together. Fasten off.
  12. Make pompom in contrast colour and sew securely to top.

There we go- easy, snuggly, and oh-so-frugal!

Tagged , , , , , , , , , , , ,

Steak and Kidney Pie

I always thought that making a pie had to be really complicated, but I faced my fear and tried it… and now I’m a convert!! This is the second time I’ve made this recipe… and both times it’s gone down a real treat! Not only that, but the total cost is about £1 per portion (and that’s for piggy adult portions!) Oh yeahhhh!

You will need:
– Kidneys. I bought 2 pig kidneys for 70p from Morrisons.
– Stewing steak (or other cheap steak). Mine was £2.70 from Morrisons.
– Beef stock cube
– Onion
– Puff pastry (Jus-Roll is fine!)
– Mushrooms or carrots (optional)

  1. Chop the kidneys into small chunks, removing and discarding the inner white bit (this is the tough and chewy ‘pelvis’ and doesn’t make good eating!) Fry them gently over a low heat until browned off, and remove to a large casserole dish.  
  2. Chop the beef into bite-size chunks, removing any gristle or tough white tendon. Coat in flour and fry in same pan in batches. Add to the casserole dish.
  3. Slice the onion and gently fry in same pan, then add to the casserole dish. Fry and add mushrooms here if using.
  4. Add 400ml of stock and a splash of red wine if you have any lying around, then mix into dish. Place in an oven over low heat (150) for an hour and a half at least, although going for longer won’t hurt it! *This can now be left in a fridge overnight if needed*
  5. Meanwhile, roll your pastry to 2-3mm thick and cut to the size you want. You’ll need to give your pie a base, sides, and a lid. I make mine in a small glass casserole dish, so I cut around the base to get the right size.
  6. Put the base and sides into your chosen dish and press together with a little water if you have any joins. Pre-bake in the oven for 15mins, with either ceramic baking beans or a jam jar to hold the base down a little. Don’t panic when it tries to rise- just squash it all down again when it comes out the oven!
  7. When you are ready to serve, fill the pie with the mix from the casserole dish, reserving some gravy if you like it seperate. Place the pastry lid on, and place back in the oven for 20-30mins.

I make two 2-person mini-pies at once, and freeze the second for a busy day when I can’t get around to cooking. I do all the way up to the final baking, and freeze it there, with the pastry lid on!

I serve mine with oven chips and frozen peas, and I think it’s safe to say ‘Smiles all around!’

How easy and frugal is that?

Tagged , , , , , , , , , , , ,

Cider Making!

So most of you probably think you need an apple press to make cider. And if you do a little search, you find that this is highly recommended all over the internet…and they’re really expensive. That’s how we found ourselves with two bags of apples, and no press…

So we set out to make it anyway! Here’s how:

First, we washed, then roughly chopped the apples into chunks, removing all the yucky bits, and adding the rest to a clean bucket.

Next, we added boiling water and mashed the apples up. This was using a rolling pin at first, but we quickly decided that a potato masher did a good job as soon as they were a bit mushy already.

A few days of mashing and stirring ensued, and I finally got around to chopping the second bag of apples:

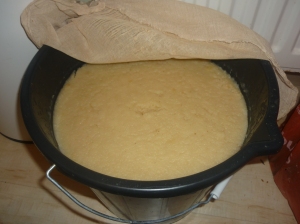
cider-making-buckets

We then used a sieve to remove the solid apple bits, and placed them into a square of muslin. Hard work followed, as we squeezed and squashed to get all the juice out. We were able to reduce each handful of solids by at least 60%, which just goes to show how much liquid we got out using this method!

Apple cider making without press

apple cider making without press

cider making without press

We then topped up the cider, added a campden tablet, and left it 24 hours before adding the yeast. Unfortunately something went wrong with the campden tabet process, because we ended up with wild yeasts starting to bubble after just 12 hours! We’ve added our yeast anyway, hoping it would out-compete the other yeasts… it certainly seems to be a busily bubbling bucket!

homemade cider without press

We also used our hydrometer to measure the sugar content of the apple juice. It was a little under what we were hoping for, so we added about 400g of sugar, and some citric acid for some flavour.

Tagged , , , , , , , , , , , , ,