Tag Archives: ideas

Christmas Hampers

Nearly everybody is getting a Christmas Hamper from us this year.

Christmas Hampers make fantastic presents for three reasons:

  1. They’re totally unique- nobody else makes lime marmalade or rose petal jelly quite like we do!
  2. They’re cheap- we’ve been preserving wild goods all year long!
  3. They’re edible, so it’s the gift that you can give again and again and again!

If you don’t know what to give to awkward family members this Christmas, I’d recommend a Christmas Hamper, full of homemade Christmas gifts! Here’s a few ideas of things you could include:

– Homemade jam or marmalade… look out for Guest writer Ian’s Lemon-and-lime marmalade recipe coming soon!
– Homemade wild jellies… like my chilli apple jelly, my rowanberry and rosemary jelly, my rose petal jelly… or one of your own!
– A small (or large!) bottle of homemade wine… or how about making an easy crab apple liqueur or beech leaf noyau?
– A hand-carved jam spoon, to go with the jams and jellies
– Some easy knitted gifts… like handwarmers, or an ear warmer, or a mug-snug. They take mere hours but make the hamper something really special!
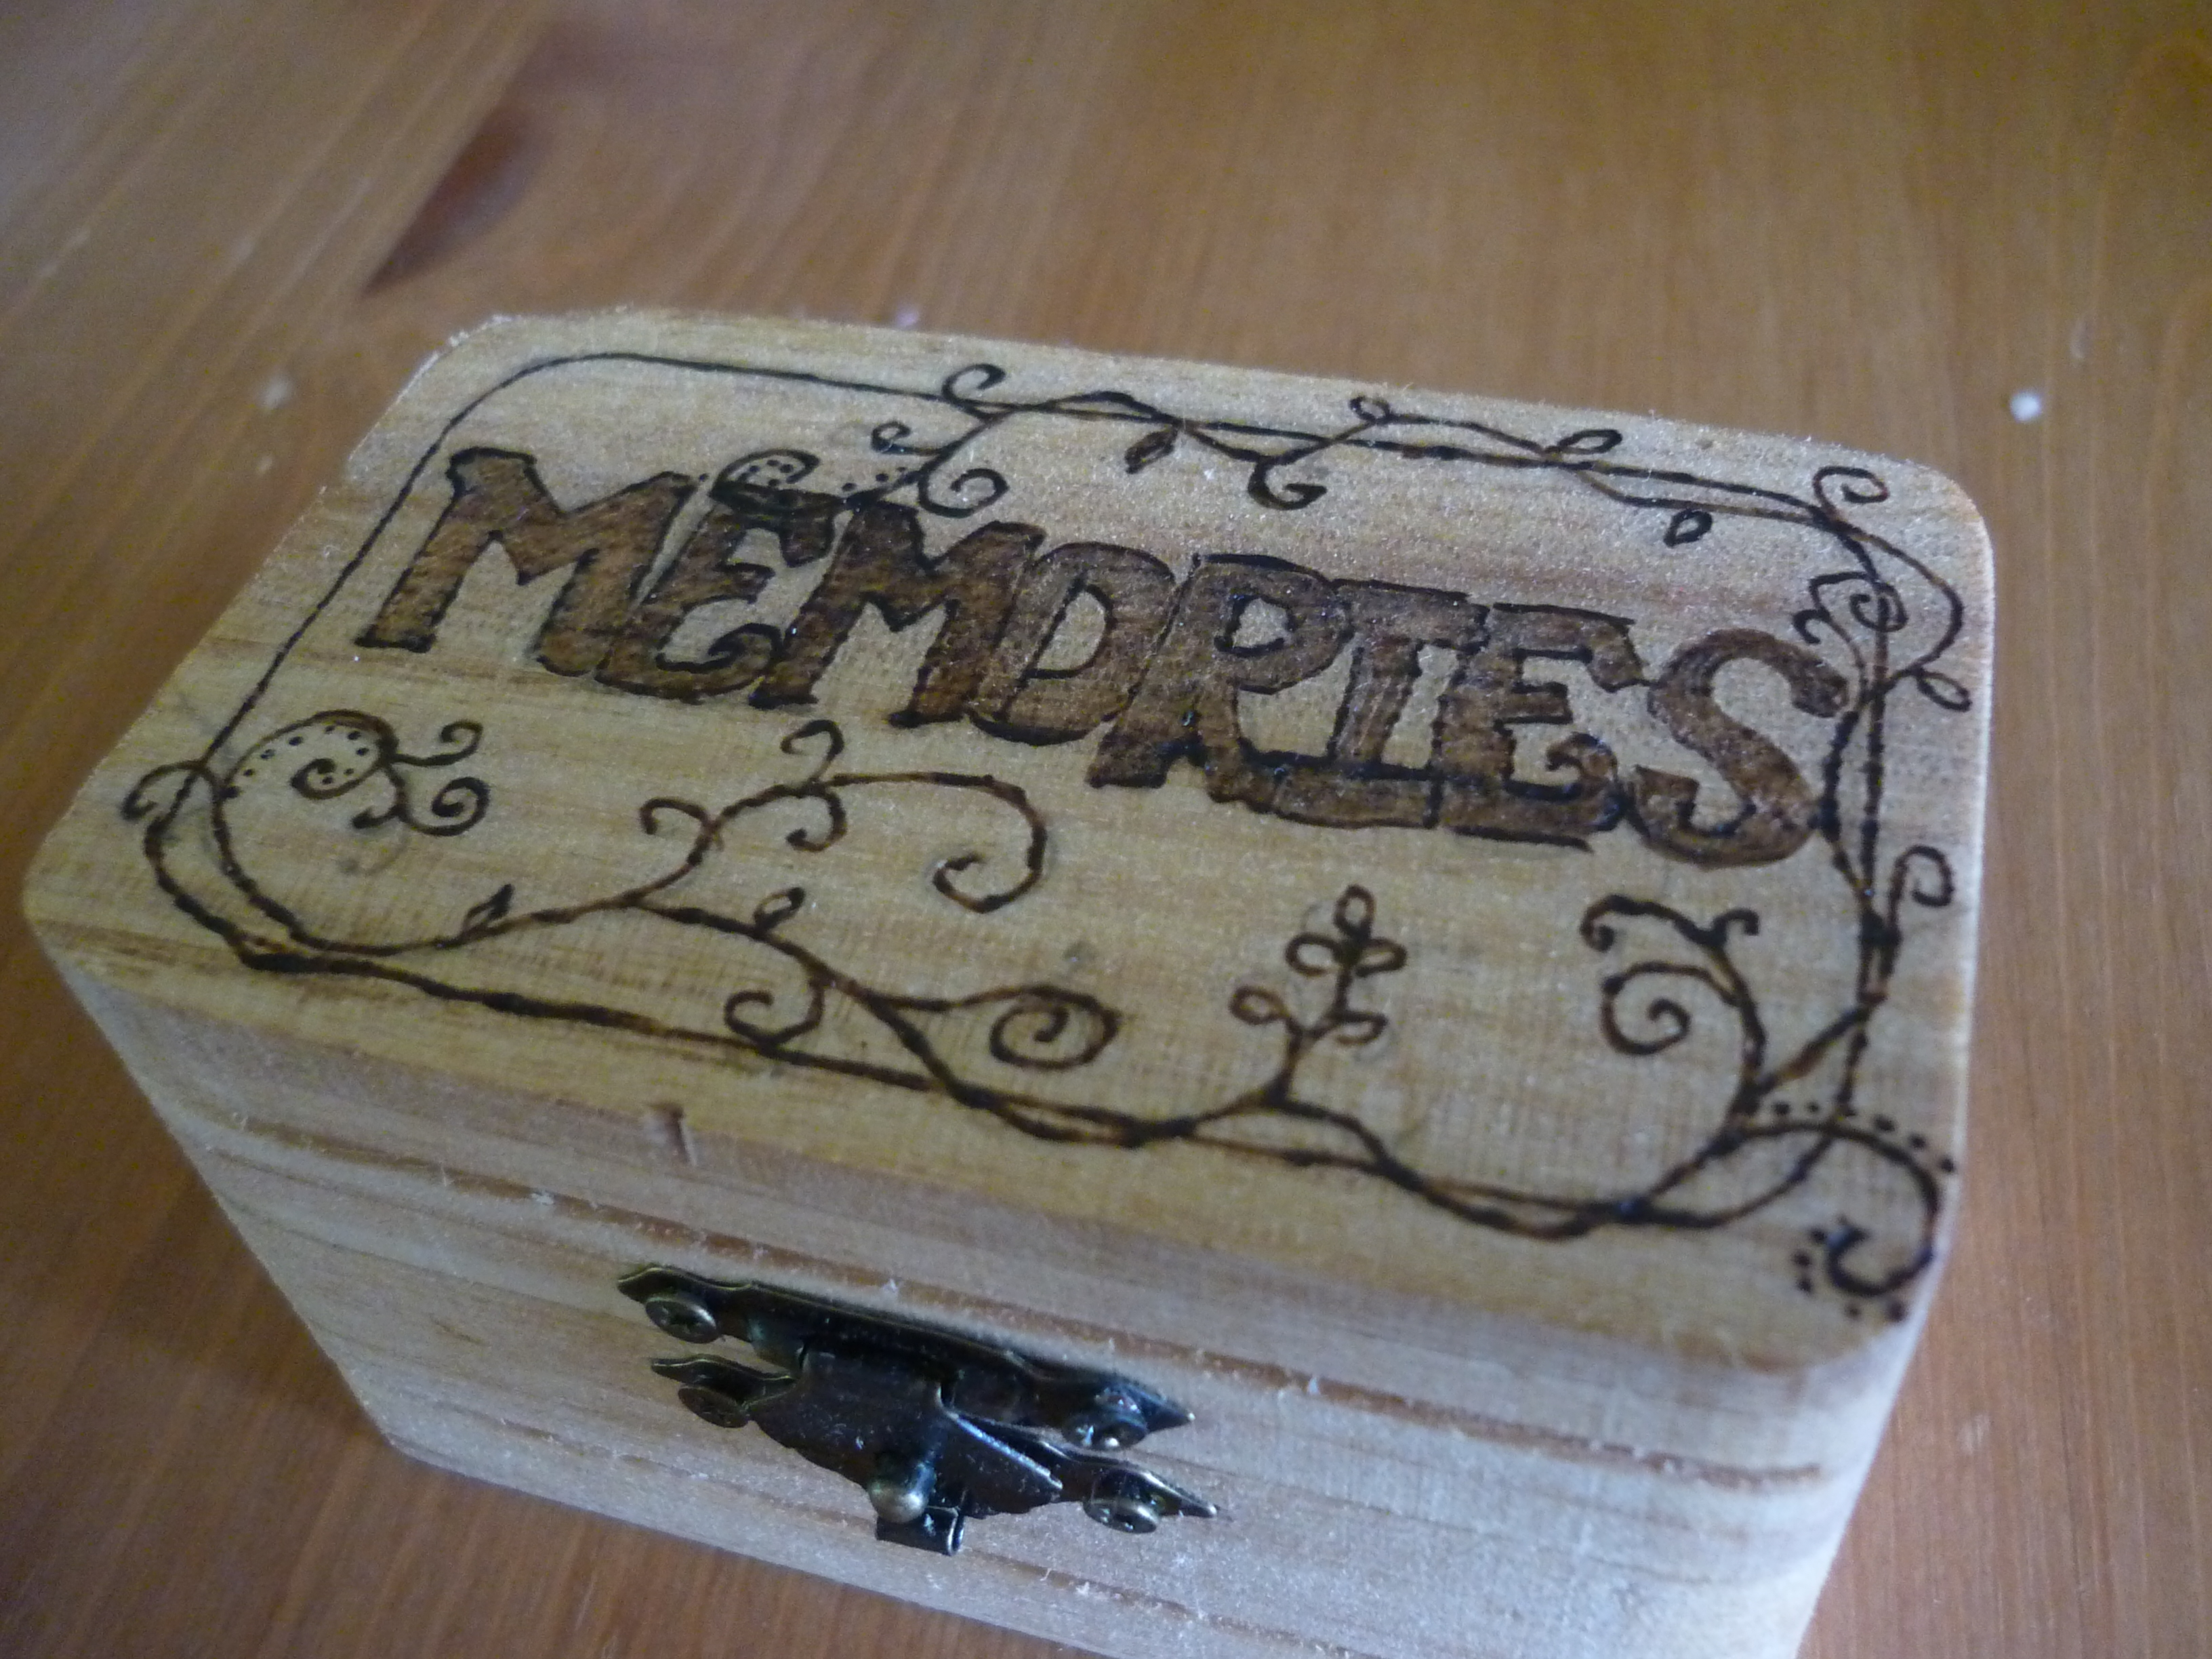
– A pyrographied spoon, like this special Christmas one, or maybe a keyring or box
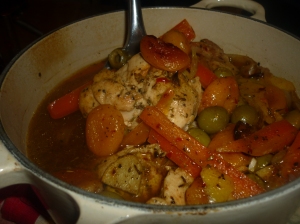
– Homemade truffles, biscuits or sweets, perhaps in a homemade box? This year we used the rose petal jelly from a previous year to make homemade Turkish delights!
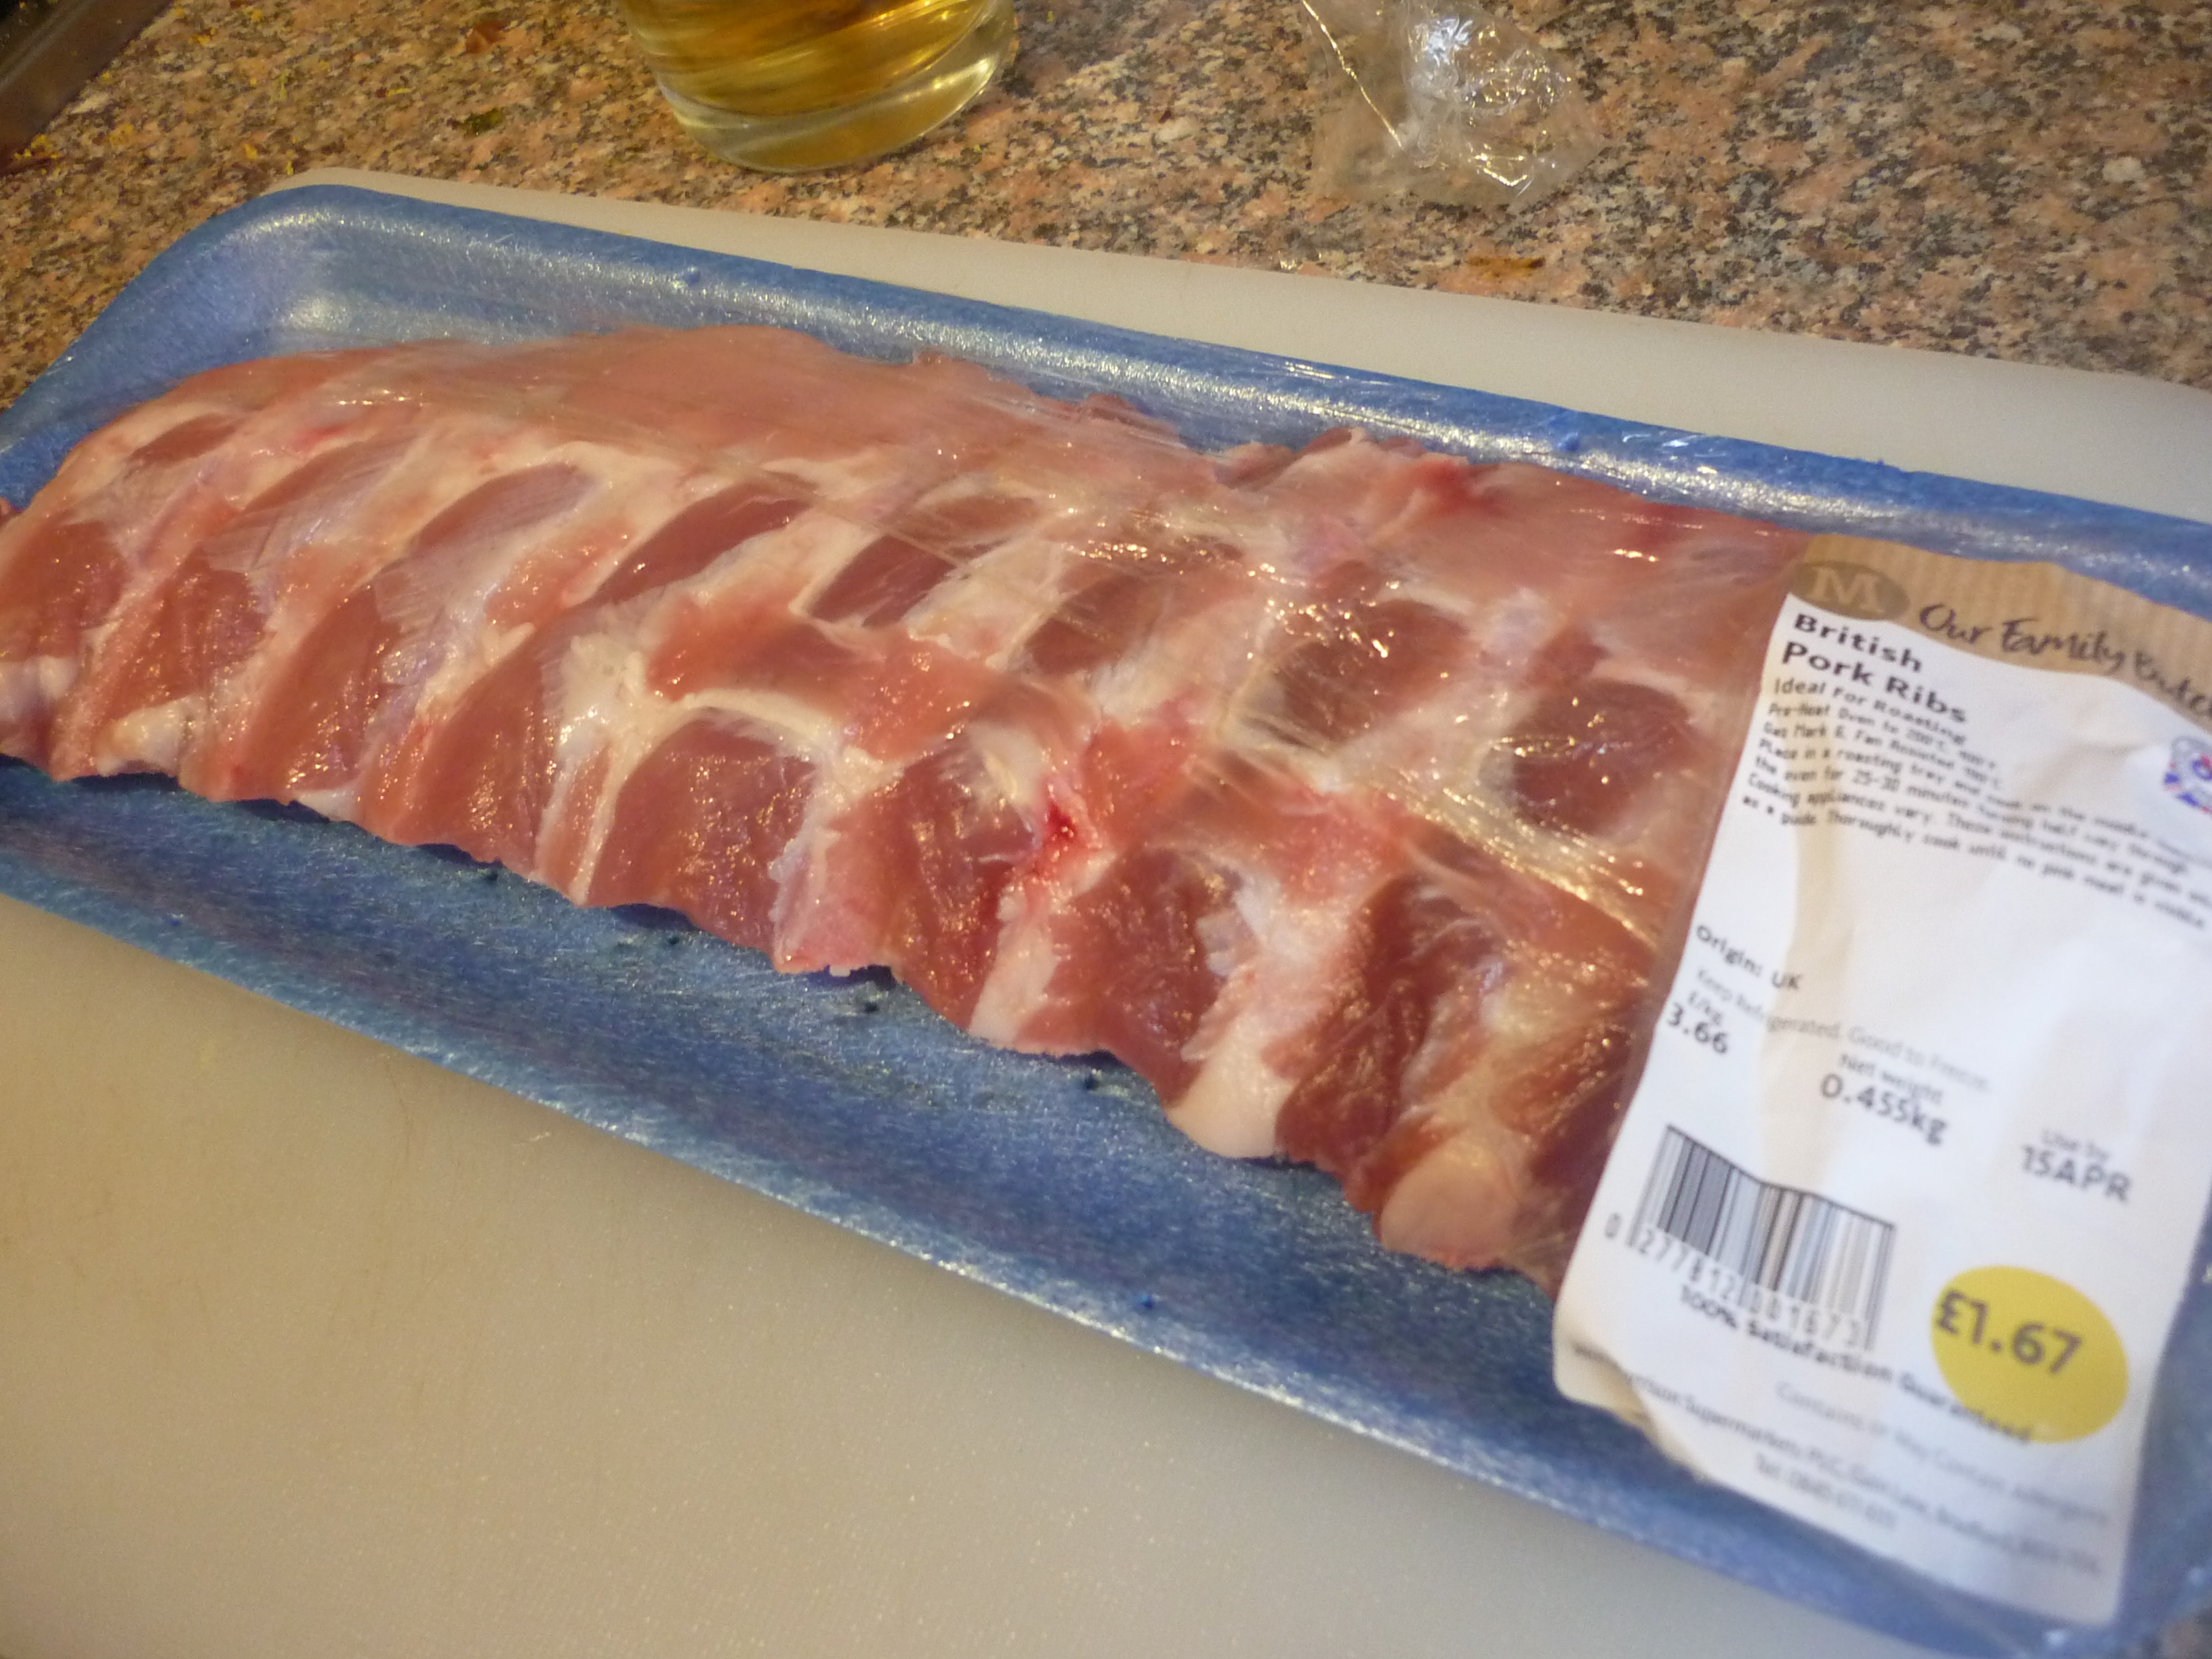
– Homemade pate or ham

This list is by no means exhaustive! If you haven’t been as organised as us you could also buy some unusual things and wrap them in a hamper. This is a really good Christmas gift if you can fit it under a ‘theme’- i.e you could make a ‘sushi hamper’ for a sushi lover, complete with chopsticks, bamboo rolling mat, plates, soy sauce, and a really sharp knife. Or if you have a friend who loves meat, you could buy some nice ham, posh sausages, bacon, steak knives, and a kangaroo steak. If somebody likes cheese, how about a cheese board, knife set, two local cheeses and a camembert baking dish? The possibilities for making a Christmas hamper unique and delicious are endless!
Then all you need to do is buy a basket or box. Wilkos is doing ‘hamper baskets’ from £1.50 and small boxes from £1, but if you want to splash out and buy a nice wicker basket to be part of the gift then that makes a lovely present too. To save on money and keep it frugal, you can wrap up an old shoe box or supermarket box, or one year I spray painted those wooden boxes you can buy satsumas in this time of year… Wrap the whole thing up (cellophane looks really lovely!) by gathering all the wrapping at the top and tying with a big bow.

This year we’re including a little card with information on what everything is, and also asking for all our jars and bottles back so we can start all over again! 🙂

TA-DAH! It looks wonderful, costs almost nothing… and next year, you can do it all again!

Tagged , , , , , , , , , , , , , , , , , , , , , ,

Mealplan Series- Number 1

So here’s my first post about meal plans! I’ve sat down with my cookbooks and worked out what we’re going to eat for the next two weeks…. so here we go!

(Please note that as Ian is away Mon and Tues night I tend to stick to pasta or leftovers- sorry there’s nothing too specific!)

Weds 22nd- Lasagne (and pear tarte tatin pudding- will last all week)
Thurs 23rd- Prawn Laksa
Fri 24th- Pheasant Stew
Sat 25th- Homemade Pizza
Sun 26th- Lamb breast roast
Mon 27th- (Pasta putanesca, pasta pesto, sausages chips and beans, leftovers)
Tues 28th- (Pasta putanesca, pasta pesto, sausages chips and beans, leftovers)
Weds 29th- Sausage Cassoulet
Thurs 30th- Pumpkin risotto
Fri 31st- Baked Pork Chops with cabbage hash
Sat 1st- Sticky Chicken Wings (Nigel Slater Recipe)
Sun 2nd- Thai Roast Chicken
Mon 3rd- (Pasta putanesca, pasta pesto, sausages chips and beans, leftovers)
Tues 4th- (Pasta putanesca, pasta pesto, sausages chips and beans, leftovers)


So here’s my shopping list:

Meat:
Pork chops (for baked pork chops)
Sausages (for cassoulet)
Chorizo (for pizza!)
Lamb breast (for roast)
(I have mince, pheasant, prawns and chicken wings in the freezer, so haven’t put these on the list, and I will buy chicken nearer the time as there’s no room in my freezer)

Fruit and Veg
Carrots (for pheasant stew)
(I already have pumpkin, potatoes, garlic, ginger, onion, pears and cabbage, so these aren’t on the list)

Dried and Tinned
Caster sugar (for pear tarte tatin)
Pasta sheets (for lasagne)
Olives (for pizza)
(I already have noodles, tinned beans, coconut milk, risotto rice, pesto, tinned tomatoes, puff pastry, honey and mustard, so these aren’t on the list!)

Dairy
Cheese (for lasagne)
Mozzerella (for pizza)
Butter (for pear tarte tatin)
Milk (for lasagne)


I shop at Aldi, but for your convenience I also looked at the prices from Tesco and Sainsbury’s. I didn’t brand match, I took the cheapest that was the same weight or same style (sliced chorizo, for instance, rather than the stick type!) And here are the results:

At Aldi, these items came to £15.13

At Tesco, £21,71

Sainsbury’s came to £20.67


So there we go- some meal ideas along with a quick price comparison for the ingredients- sorted! 🙂 Some of the meal ideas above should have recipes available on my blog… I’ll link what I can, and more will be coming later!

Tagged , , , , , , , , , , , , , , , , , , , , ,

Autumn Harvest- 3 Favourite Blackberry Recipes

Well, if it isn’t that time of year already!

The hedgerows are full of fantastic fruits, just begging to be picked. Great big blackberries that are so ripe they melt in your hand; smaller, tighter fruits that leave a fruity tang; plum trees, their boughs bending under the weight of the fruit they hold; elderberries, black and round, tumbling from trees like jewels… two for the basket, one for the mouth… sweet sticky fingers, a trace of telltale pink around the mouths of all…

I love autumn, can you tell?

So just because it’s so lovely, here are my 3 favourite frugal things to do with all those tubs of blackberries!

Blackberry Jam

Yum. A firm favourite in my house, so that several batches have to be made to allow any to be left for gifting at Christmas! This dark purple-black jam is thick, spreads well, and is high in vitamins C and K, so it’s great for staving off those winter colds!

Blackberry-jam-recipe-ideas

Blackberry Wine

After making this for the first time last year, it has become a must-do in our house! The rich colour of the blackberries lend themselves to making a red, and it’s ready very quickly! We drank our first bottle on Christmas eve, and it was our best success yet! Even my parents drank it- the bottle was gone in no time!

Blackberry-wine-recipe-ideas

Blackberry and Apple Crumble

The classic use for blackberries, this traditional pudding is what most people think of when they collect blackberries. Easy to make, and a great one for the kids to get involved in, it’s perfect after a Sunday Roast!

For a slight twist, try freezing the blackberries and chopped apples in tubs in the freezer, and making a batch of topping, then putting it in the fridge. Then, whenever you need a pudding it’s no hassle at all to put together a miniature crumble in a ramekin! I make these most nights in the winter as they’re a low-sugar pudding, portion-controlled, and are quicker to cook than their big cousins. Just chop half an apple into each ramekin, add 4-6 blackberries, sprinkle over topping, then bake for 10-15mins!

Mini blackberry and apple crumble

crumble recipe


Go on out and pick a tub… it’s free entertainment AND free food!

What are your favourite recipes with blackberry? What do you do with them each year? Let me know in the comment section!

Tagged , , , , , , , , , , , , ,

A summery maxi dress…


Ah summer may be almost gone, but my sewing projects have finally caught up with the season!

In preparation for summer, I decided to make a maxi dress… (Everyone who knows me will know that being 5ft tall is a real problem when it comes to clothes, and maxi dresses are the worst… I own one, and it was handed down to me when a friend shrunk it in the wash! Nothing else fits!) only then my sewing machine broke and it’s now autumn!

Oh well, it’s ready for next year then!

Anyway, making one means that I can actually make it fit, and I really like the design on this one here. The blocked colours make it easy to make, and I love the use of old t-shirts to make the dress!

Unfortunately, without any old t-shirts to raid I went to the next best thing: Primark! I wanted to do the colourblock thing, but I decided to do them in darkening colours- from a white top down to a navy blue at the bottom! Four cheap t-shirts later and I had all I needed to get started!

First, I cut the hems and the necklines off the t-shirts, so that I had bands of coloured fabric. Don’t cut the hem off the bottom one, it means you don’t have to hem it yourself!

Next I pinned and sewed the strips together inside-out. The light blue strip was a little large so I cut it down to size and re-joined it. I then sewed all 3 to the top, and ta-dah! Done!

Except I put it on and the light blue one was totally see-through…. so next thing was another shopping trip to Primark, to get an identical blue t-shirt. I sewed this one to the inside, like a lining, and my underpants were no longer visible… at least not without looking too hard!

I’ll post some photos of me wearing it… it’s pretty cool!

DIY-dress-colour-block

P1090030

Colour-block-DIY-dress

Tagged , , , , , , , , , , , ,

Pyrography… a new skill

Pyrography literally means ‘fire-pictures’ and is the act of using a hot rod to burn a design into wood or leather. It’s a little like drawing, but it has a number of pitfalls.

Unlike drawing, the darkness of the burn depends on two things- the heat of the iron, and the length of time you hold it in place. So you can’t pause to think where you’re going next! For this reason, the more detailed the piece, the harder it is to do!

I’ve been working on these little boxes that I bought from Craft & More in Broadmead, Bristol, and used them to work on my style.

Celtic-knot-pyrography-box

Heart-pyrography-box


Pyrography-treasure-box

Butterfly-box-pyrography

Celtic-knot-box

I’ve also been making these little keyrings from cross-cut round wood which has been sanded and polished up. (Yes, I cut and sanded it myself- by hand!)

Pyrography-keyrings

Pyrography-keyring-anchor

The patterns are usually drawn in pencil and then burnt into the wood, but for some of the more complicated patterns I’ve been tracing from a print out. Cheating, I know, but look how complicated some of them are!

Celtic-star-box

Box-pyrography-flower-pattern


Anyway, pyrography kits can be cheap for basic ones (we got ours for around £20) and provide hours of entertainment! The things you make are really individual and are a work of art in themselves. They make great gifts too!

Tagged , , , , , , , , , , , , ,

Wild Rose Jelly

Spring is here, and with it comes the beautiful flowers that line the hedgerows. Every year I get overly excited planning all sorts of amazing forages, and some years I even manage to do some of them!

This year was time for a new one: wild rose jelly. I’ve long been tempted to use these sweet smelling flowers, and the opportunity to make something for a Christmas Hamper that nobody else will have did spur me on somewhat!

The recipe I used was as follows:

  • As many rose petals as I could pick (about a pint). I tried to pick ones that were due to fall soon, so as not to reduce the number of rosehips in autumn!
  • 500g of preserving sugar with added pectin
  • A tiny bit of lemon juice
  • Water (500mls)

I put them all together in the pan, reserving just a couple of petals for later, and heated gently until the sugar had dissolved, and then hard until a rolling boil was reached. This is when the bubbles on the top are too thick to be broken with a spoon- they just carry on going!

Test the jelly on a cold plate- if you can run your finger through it and it crinkles, it is ready!

Stir in the reserved petals and pour into warm sterilised jam jars. I used baby sterilising tablets AND heated them in the oven, just to be sure.

Seal, label, and leave!

The result is a sweet jelly favoured by the Turkish, and can be eaten with yoghurt. Personally, I’m going to give some away, and the rest can be made into my own Turkish delights!

Tagged , , , , , , , , , , , , , , , , , , , ,

Ginger Glazed Sticky Spare Ribs… wow!

sticky_glazed_spare_ribs

Wow. Just wow.

This recipe was always one of my favourites as a child, but when I realised it was this cheap and easy to do, I feel like I’ve discovered Heaven. Or Narnia.

It’s one of those meals where you’re proud to come away with sticky sauce all over your face- and therefore one that the kids will LOVE!

The recipe originally came from Far Eastern Cookery by Madhur Jaffrey, who got it from Andy’s Kitchen Restaurant in Causeway Bay. I, in turn, give it to you, with one or two tweaks! The meal works out at about £1 a person, or a little over, once you have done some veg.

Pork ribs are very cheap, and can be picked up from your local butcher, or also from Morrisons, who seem to have them most days! This pack will feed two easily, and as you can see is only 1.67!

Morrisons_pork_ribs_recipe_glazed

First, cut your ribs away from one another by pushing a knife between the bones. You could ask your butcher to do this for you, but it isn’t hard to do!

How-to_glazed_ribs_recipe_summer_cheap

Place them in a saucepan with:

  • Equal parts soy sauce and sugar (10 desert spoons is about right for 4 people) The sugar can be partly replaced with honey if you prefer.
  • 2 one-inch pieces of ginger (lightly crushed, so the juice escapes)
  • A litre of water

Recipe_honey_ginger_glazed_ribs

Then cover, bring to the boil, reduce and simmer hard for 45 minutes to an hour, stirring occasionally.

Remove the lid and cook for a further 30minutes or until the sauce has reduced to a sticky glaze. This happens quickly towards the end so keep an eye on it and stir it to make sure the glaze sticks to all the ribs!

Serve with sweet potato chips or plain boiled new potatoes crushed into the sauce, and lots and lots of kitchen roll to wipe the mucky hands and faces!

spare_ribs_sweet_potato_honey_ginger

Tagged , , , , , , , , , , , , , , , , , , , ,

My first circle skirt

Ah, a circle skirt.

The easiest skirt to make. Ever. Supposedly!

Time for me to give it a go I guess!

I bought this fabric off ebay. I love the huge spots and the navy, and it will be really easy  to match with my clothes- a white blouse will go perfectly!

First, I folded it into quarters, with the ‘wrong’ side out.

Then I measured my waist, and divided this number by 6.28 (Pi x2) to get the radius. I found the corner with all of the folds on it (i.e no edges), and measured the radius from there, drawing it into a circle as I went. I then measured the distance from my waist to my knee, and measured a second circle this distance from the first. Both of these circles were then cut out, leaving a doughnut shape!

Next, I cut out the waist band. This was the circumfrence of my waist, plus a little bit, and cut twice as thick as I would want it to be (so 8cm wide, to be folded to make 4cm wide band).

I then sewed the waist band, right sides together, and turned it right-side out, so that I had a neat tube. Next, I pinned it to the skirt, starting at a small hole I had made for the zip and going around until the whole circumfrence of the inner circle was pinned to my waist band. Due to differences in sizing I had to pin in a couple of pleats to make it fit, but it wasn’t hard to do!

Next, I just sewed this bit to the waistband (again, right sides together) and unfolded it, then pressed it, forming a neat join. I folded the bottom 5ml up and sewed that to make a hem, and also bought a 6inch zip to attach. This was pinned into the hole I had left and sewn using a zipper foot! Cool!

So whilst all of that may sound complicated to the untrained eye, I can report that sewing a circle skirt is easy after all- despite all the questions I had at the start! It’s definitely one of those things I’d recommend giving a go even if you aren’t sure- you learn on the go!

Tagged , , , , , , , , , ,

Yummy Chicken Tagine

Chicken_Tagine_Apricots_olives

Now this is really delicious!

The unusual Moroccan flavours really bring the chicken to life, and you can make it using any old bit of chicken- even cheap drumsticks! I bulked mine out with extra onions and also carrot sticks, but chunks of sweet potato or butternut squash work just as well! Some recipes call for preserved lemon, but I used curls of lemon rind stripped from a raw lemon, and this worked just as well!

You will need:
– 1-2 pieces of chicken per person. Try chunks of breast, thighs, drumsticks or whole legs!
– 1 small onion per person.
– Ground ginger (and/or grated root ginger)
– Cumin seeds (or ground cumin)
– Coriander seeds (or ground coriander)
– Dried apricots
– Enough chicken stock to cover (around 500ml)

Optional extras:
– Butternut squash or sweet potato (chopped into chunks and peeled)
– Olives, preferably purple.
– Carrots (matchsticked)
– Honey

Marinade the chicken in the spice mix for as long as possible.

If you are using brined olives, soak in hot water for as long as possible to reduce the taste. Better yet, buy olives in oil!

Fry off the onions, and place in a casserole dish. Then brown the chicken, and fry with the spice mix for a couple of minutes.

Pour it all into the casserole, along with carrots (if using), olives (if using), dried apricots and butternut squash.

Cover with the stock (and honey if using) and place in oven at 180C for an hour to an hour and a half. If you wish, the lid can be removed for the final half hour to allow some of the liquid to evaporate and the sauce to thicken slightly.

Serve with couscous, quinoa or rice to soak up all the juice. Leftover juice can be eaten as a soup the following day- it was delicious!!

Chicken_tagine_Recipe_Cheap

Tagged , , , , , , , , , , , ,

Upcycling a little-worn dress…

It’s coming into spring now, and I’m starting to think about my summer wardrobe. Usually, I am on holiday at my parents’ place in the Channel Islands, so this consists of denim shorts, little skirts, and a bikini top.

This year, however, I’ll be working at the school into the summer, and so I need something a little more…. school appropriate!

Instead of looking on ebay, I decided to try to look at my wardrobe with new eyes, and I found a navy ASOS dress scrumpled on the floor and only worn once. This was already frugal enough, as I got it handed down brand new from somebody who had never worn it. But it seems a shame not to wear it, so I tried it on.

Far too low-cut for school. And a bit maternity-looking. And a bit plain. (Sorry I didn’t get a picture, you’ll have to imagine it!)

Time to upcycle!!

I knew straight away what I wanted to do with it. Adding a lace bottom and neckline would allow me to fill in the neckline and yet make it look like it was meant to be there!

The local haberdashery (Sew and Sew, Westbury-on-Trym) had some beautiful thick crochet laces, so I bought 3 types- two possibilities for the neckline, and one thicker one for the base. I also bought some navy blue thread, and it was time to get started!

(Note: Please forgive my lack of ‘sew speak’ – I am new to this and have never been taught all the proper words so I’ll just call it as I see it!)

I pinned the 2inch thick lace all the way around the base of the  dress. I wanted the background of the lace to be partly navy, but for the scalloping to stick out past the bottom (otherwise it would look weird) so I pinned it about an inch from the hem.

Then I used my sewing machine on ‘zig-zag’ stitch to oversew the top edge of the lace with navy blue. It wasn’t the neatest in the world but luckily the way the dress hangs means it doesn’t have to be!

Lace_Upcycle_dress

Next thing was to pin the neckline. Having pinned it both ‘inside’ (so that the edge of the crochet was hidden by the original neckline of the dress) and ‘outside’ (so the straight edge could be seen) the general consensus was that the outside looked best. A bit of a shame for me, as this looked harder, but I could give it a go all the same!

Add_Lace_upcycle_dress

Whilst in the charity shops I looked closely at how other people sewed lace on. And it turns out my way wasn’t the neatest way, so I tried their way. This time, I used white thread and used the straight stitch on my sewing machine. It turned out far more invisible!

So here are some artsy shots of me wearing it. Ta-dah for meee!

P1090034

Upcycling-dress-lace

So to re-iterate. A dress that cost me nothing. 3 1/2 m of various laces (£3 or so). A little thread (£1.60 for the whole spool), and a little of my time…. equals a unique, cute and flirty dress! Priceless!


Tagged , , , , , , , , , , , , ,

Pig Cheeks in Cider Sauce

If totally-made-up-heaven is your kinda meal,  read on!

This recipe is one I’ve been working on for a little while, and although it’s not quite perfected, I couldn’t wait to share it with you all!

Ingredients:

1-2 pig cheeks per person (~50p each from Morrisons)
1 large onion (pennies!)
1 medium-large carrot per person (pennies!)
1 can of cider (2.29 for 4 from Aldi)
Mushrooms
Bacon- sliced (optional)
Herbs- Bay leaf, ‘mixed herbs’ (thyme, rosemary), sage.

1. Cover the cheeks in cider, add herbs and seasoning, and slow cook for 4 hours on high, or 8 hours on low. If you aren’t using a slow cooker, go straight to step 3a.

2. Fry the onions, and place in the bottom of a casserole. Sprinkle the carrots over, then place pork cheeks on top. Pour cider over.

Pork_Cheeks_in_cider

3a. If you haven’t slow-cooked the pork already, cook now for 2-3 hours in a 120C oven before carrying on to the next step.

3b. If you’ve slow cooked the pork, de-stem the mushrooms and add them, gills up, to float on the cider sauce. Cook for 30-40mins at 180C, without the lid on. You want the mushrooms to go wrinkly and the cider to reduce, if possible.

4. Serve straight from the casserole with chunky homemade bread, mashed potato, or a baked potato!

Give it a go- it’s frugal!

Tagged , , , , , , , , , , , ,

Sunday Roast- Ways With Veg

Up this week is a little segment about ways to cook your veg to make them more interesting as side dishes to your roast. As mentioned in an earlier article ‘How to Make Less Feed More’, making creative side dishes to your roast is an excellent way of keeping a meal cheap and tricking people into not realising how little meat they’ve got!

My favourite way to cook carrots has to be with honey and mustard, but Ian really enjoys my brussels with bacon! Have you got a favourite?

Brussel Sprouts:

With bacon- Boil for 5 minutes, then blanch in cold water. Fry chopped bacon in a pan, and add the brussels for the final 5mins of frying. Make sure they’re coated in the bacon grease and crispy on the outside!

Broccoli:

With cheese: Par-boil chunked broccoli until tender, then drain and place in casserole. For the cheese sauce- Fry a little butter in a saucepan, then add flour. Cook for 1-2 minutes and then add milk little by little (whisking as you go) until you have enough to cover the broccoli. Turn up the heat and continue to stir, scraping the bottom, until it thickens to the consistency you want. Add salt, pepper, and grated cheese, and pour over broccoli. Grate more cheese over the top and bake for 30-40mins, or until cheese topping has turned brown.

Simply boiled- Boil for 5 minutes until tender (check with a knife) and drain and blanch in cold water. Serve with similarly treated carrots for a colourful side dish!

Carrots:

Honey and mustard carrots- Matchstick carrots and place in a frying pan. Cover with water, 2tbsp of honey and 1tbsp of wholegrain mustard. Simmer until carrots are tender and coated in sticky honey glaze!

Ginger carrots– Matchstick or slice and treat as above, this time adding a cube of ginger along with them for a Thai twist. These go really well with lemon-roasted chicken!

Roasted- Chop into large chunks and par-boil along with the potatoes for the final couple of minutes. Drain and put into roasting tin with plenty of oil. These are the easiest carrots to do as they require no extra work, but they don’t add much to the illusion that there are loads of plates on the table!

Cauliflower:

With cheese- Make as for broccoli cheese but replace broccoli with cauliflower and treat exactly the same!

Courgette:

Fried- Slice thinly lengthways and pan-fry in a little butter until almost see-through. Sprinkle with black pepper and serve.

Leeks:

With Cheese- Make as for broccoli with cheese sauce, but replace broccoli with leeks boiled for 1-2minutes to soften. Try using half cheddar and half blue cheese for a twist!

Parsnips:

Roasted– Chop into large chunks and add to the boiling potato water for the final 5mins of boiling. Then drain with potatoes and add to roasting dish along with potatoes, and cook for the same length of time. This is the easiest way to cook parsnips, because you don’t have to do anything more to them!

Puree– Boil until tender, and add to food processor along with a clove of garlic. Add a little cream or milk and process until soft and peaky.

Fried- Slice thinly lengthways and fry in butter for a slightly unusual parsnip dish. Try adding ginger for a more exotic flavouring.

With Parmesan- Par-boil parsnips for 5 minutes, drain, and roast for 30. Grate plenty of Parmesan over the top and bake for a further 30mins. Alternatively, Delia’s method is to shake them in a flour and Parmesan mixture whilst they are still hot from the par boil, then roast for 20mins, turn, and roast again.

Sweet Potatoes:

Roasted- As with other root veg, chunk, par-boil and treat as potatoes. Cook for an hour and a half to two hours in a 160-200 C oven.

Swede:

Roasted– As with other root veg, chunk, par-boil briefly, and treat as potatoes from then on.

Mash– Chunk and add to boiling water for 10mins to tenderise. Drain and add to food processor along with a clove of garlic. Puree, adding milk or cream if necessary. You can also add a little carrot to bulk out and remove the slight bitterness of the swede.

Tagged , , , , , , , , , , , , , , , , , , , , , , ,

Sunday Roast- Make Less Feed More

Welcome to the Sunday Roast Specials…

Up this week- how to make a little meat go a long way without people feeling cheated!

“As the queen of keeping it cheap, making less feed more is one of my most important skills. Here are some of the cheats I use on my Sunday Roast to keep it frugal!”

  • Buy more unusual cuts, such as belly of pork or lamb breast (you can see recipes here!).
  • Generally speaking, chicken and pork are cheaper than beef or lamb, so try to stick to these.
  • Shop around- Aldi does  1kg no-bone pork shoulder joints for as little as £3.49!
  • Bulk it out using cheap potatoes. As a rule I use one small potato each if I’m doing other root veg, but do two, or three…. so people won’t notice they aren’t getting as much meat or a variety of veg! You could even make two potato dishes (mash and roast, for instance) to disguise the fact you’re filling people on potatoes!
  • Onions are also cheap- add them to your veg roasting dish for the last hour to bulk it out further!
  • Carrots are cheap too- instead of roasting them, try making them as a separate side dish! The extra dishes on the table and piles on the plate draw attention away from how little there is in each pile!
  • Pick what’s in season. Leeks are in season now, and are cheap, and brussels are coming to the end of their season. Savoy cabbage is cheap this time of year and can be blanched then fried with a little bacon for a yummy side dish that even fussy kids will eat!
  • Adding stuffing made from a stuffing mix is another way to ensure people are full up without feeling left out! It’s cheap too!
  • Don’t buy gravy, make it from the juices that leave the meat during cooking, and save yourself a fortune! (It tastes better too!)
  • Don’t forget to use the leftovers! A leftover chicken carcass can be used for my chicken soup and leftover roast chicken can be made into a pie. Leftover pork is brilliant in sandwiches with sauce, and old roast potatoes can be made into potato cakes for tomorrow!

Go on, make that roast go further! And if you have any more suggestions, please comment! I’d love to hear your thoughts!

Next Week: Foolproof Crackling!

Tagged , , , , , , , , , , , , , , , , ,

Slow Braised Pig Cheeks

Braised pig cheeks… a.k.a the first slow-cooker experiment!

Long time no write! I hear you shout.

Well, I’ve been busy with my slow cooker! I reply.

Anyway, here’s the first recipe I tried, modelled on one by Nigel Slater (barely), although with a lot less wine involved (expensive!!) and using a slow cooker instead (awesome) and with some marinading, but without all the celery (although you can add this if you wish). So… not actually really based on one by Nigel Slater at all!

Slow Braised Pig Cheek Stew

– Pig cheeks (1-2 each, available from Morrisons or ask your local butcher)
– Carrots
– Onions
– Garlic
– Red wine (any leftovers or as much as you can afford)
– Stock (pig or vegetable, preferably)
– Flour
– Mixed Herbs

1. Marinade the cheeks in garlic and red wine overnight.

2. Roll the cheeks in seasoned flour, then brown in a drop of oil.

3. Use some of the wine from the marinade to deglaze the pan, then pour the whole lot into a slow cooker with the onions, along with enough stock to make up the mixture (cover the cheeks and make up to around 1L). Don’t add the carrots now, because it turns out that if you do this everything just tastes like pork soup and they’ll be totally overcooked and lose all their colour anyway!

4. Cook for 3-4 hours on high, or 7-8 hours on low. Alternatively put it in a casserole in a low oven for 2-3 hours, covered, and skip to step 6.

5. When you return home from work, your house will smell amazing. Transfer the whole lot to a casserole dish and place in the oven, along with chopped carrots and anything else you want to add.

6. Cook for another hour or so, uncovered, to allow the sauce to reduce a little. If necessary, place on stove top and cook on high to reduce further, and thicken with cornflour.

7. Serve with mash, noodles tossed in creme fraiche, or dumplings. or baked potato. Or crusty bread…. or anything else you fancy!

Congratulations, a truly wonderful and very very frugal dish, with minimal effort!

FRUGALICIOUS!!!

Tagged , , , , , , , , , , , , , , , ,

Gnocchi with Blue Cheese Sauce

Om nom nom nom nom!!!

This was a DELICIOUS meal!

The recipe was loosely based on one from Tom Kitchin’s book ‘From Nature to Plate’- an already much-loved Christmas present! This recipe was the very first to catch my eye as I flicked through on Christmas day, and may seem somewhat out of place amongst the octopus carpaccios and game pithiver. Nevertheless, it promised a hearty-home-cooked meal, and it delivered without a doubt!!

Step 1:

Make the gnocchi as described in this post here. Plain ones worked very well with this meal, as the blue cheese is very strong. Then pan-fry in a little oil and butter.

Step 2:

Prepare your veg- I used runner beans (boiled and blanched) and roasted some old leftover cherry tomatoes too.

Step 3:

Make your blue cheese sauce. Heat equal amounts of cream and milk together in a pan, then stir in twice as much blue cheese. I used some old stilton left from Christmas, but any blue cheese will do!

Step 4:

Toss the beans, tomatoes and gnocchi together, and pour the sauce over the top.

Ta dah! Guaranteed to make you ‘ohh’ and ‘ahh’, especially if you’re a blue cheese freak like me!

Plus, it’s pretty frugal! It used up loads of leftovers for me, so it was pretty much free, but with cheap blue cheese it shouldn’t cost more than about £1 a portion!

Lush.

Tagged , , , , , , , , , , , ,